Recommended by Top Agencies, Networks, Training Organizations


On-Demand Training
Canopy Connect Boot Camp
Can't wait for an onboarding session? Join Casey's on-demand Canopy Connect Boot Camp to learn techniques for using Canopy Connect for sales, referrals, marketing, and social media.
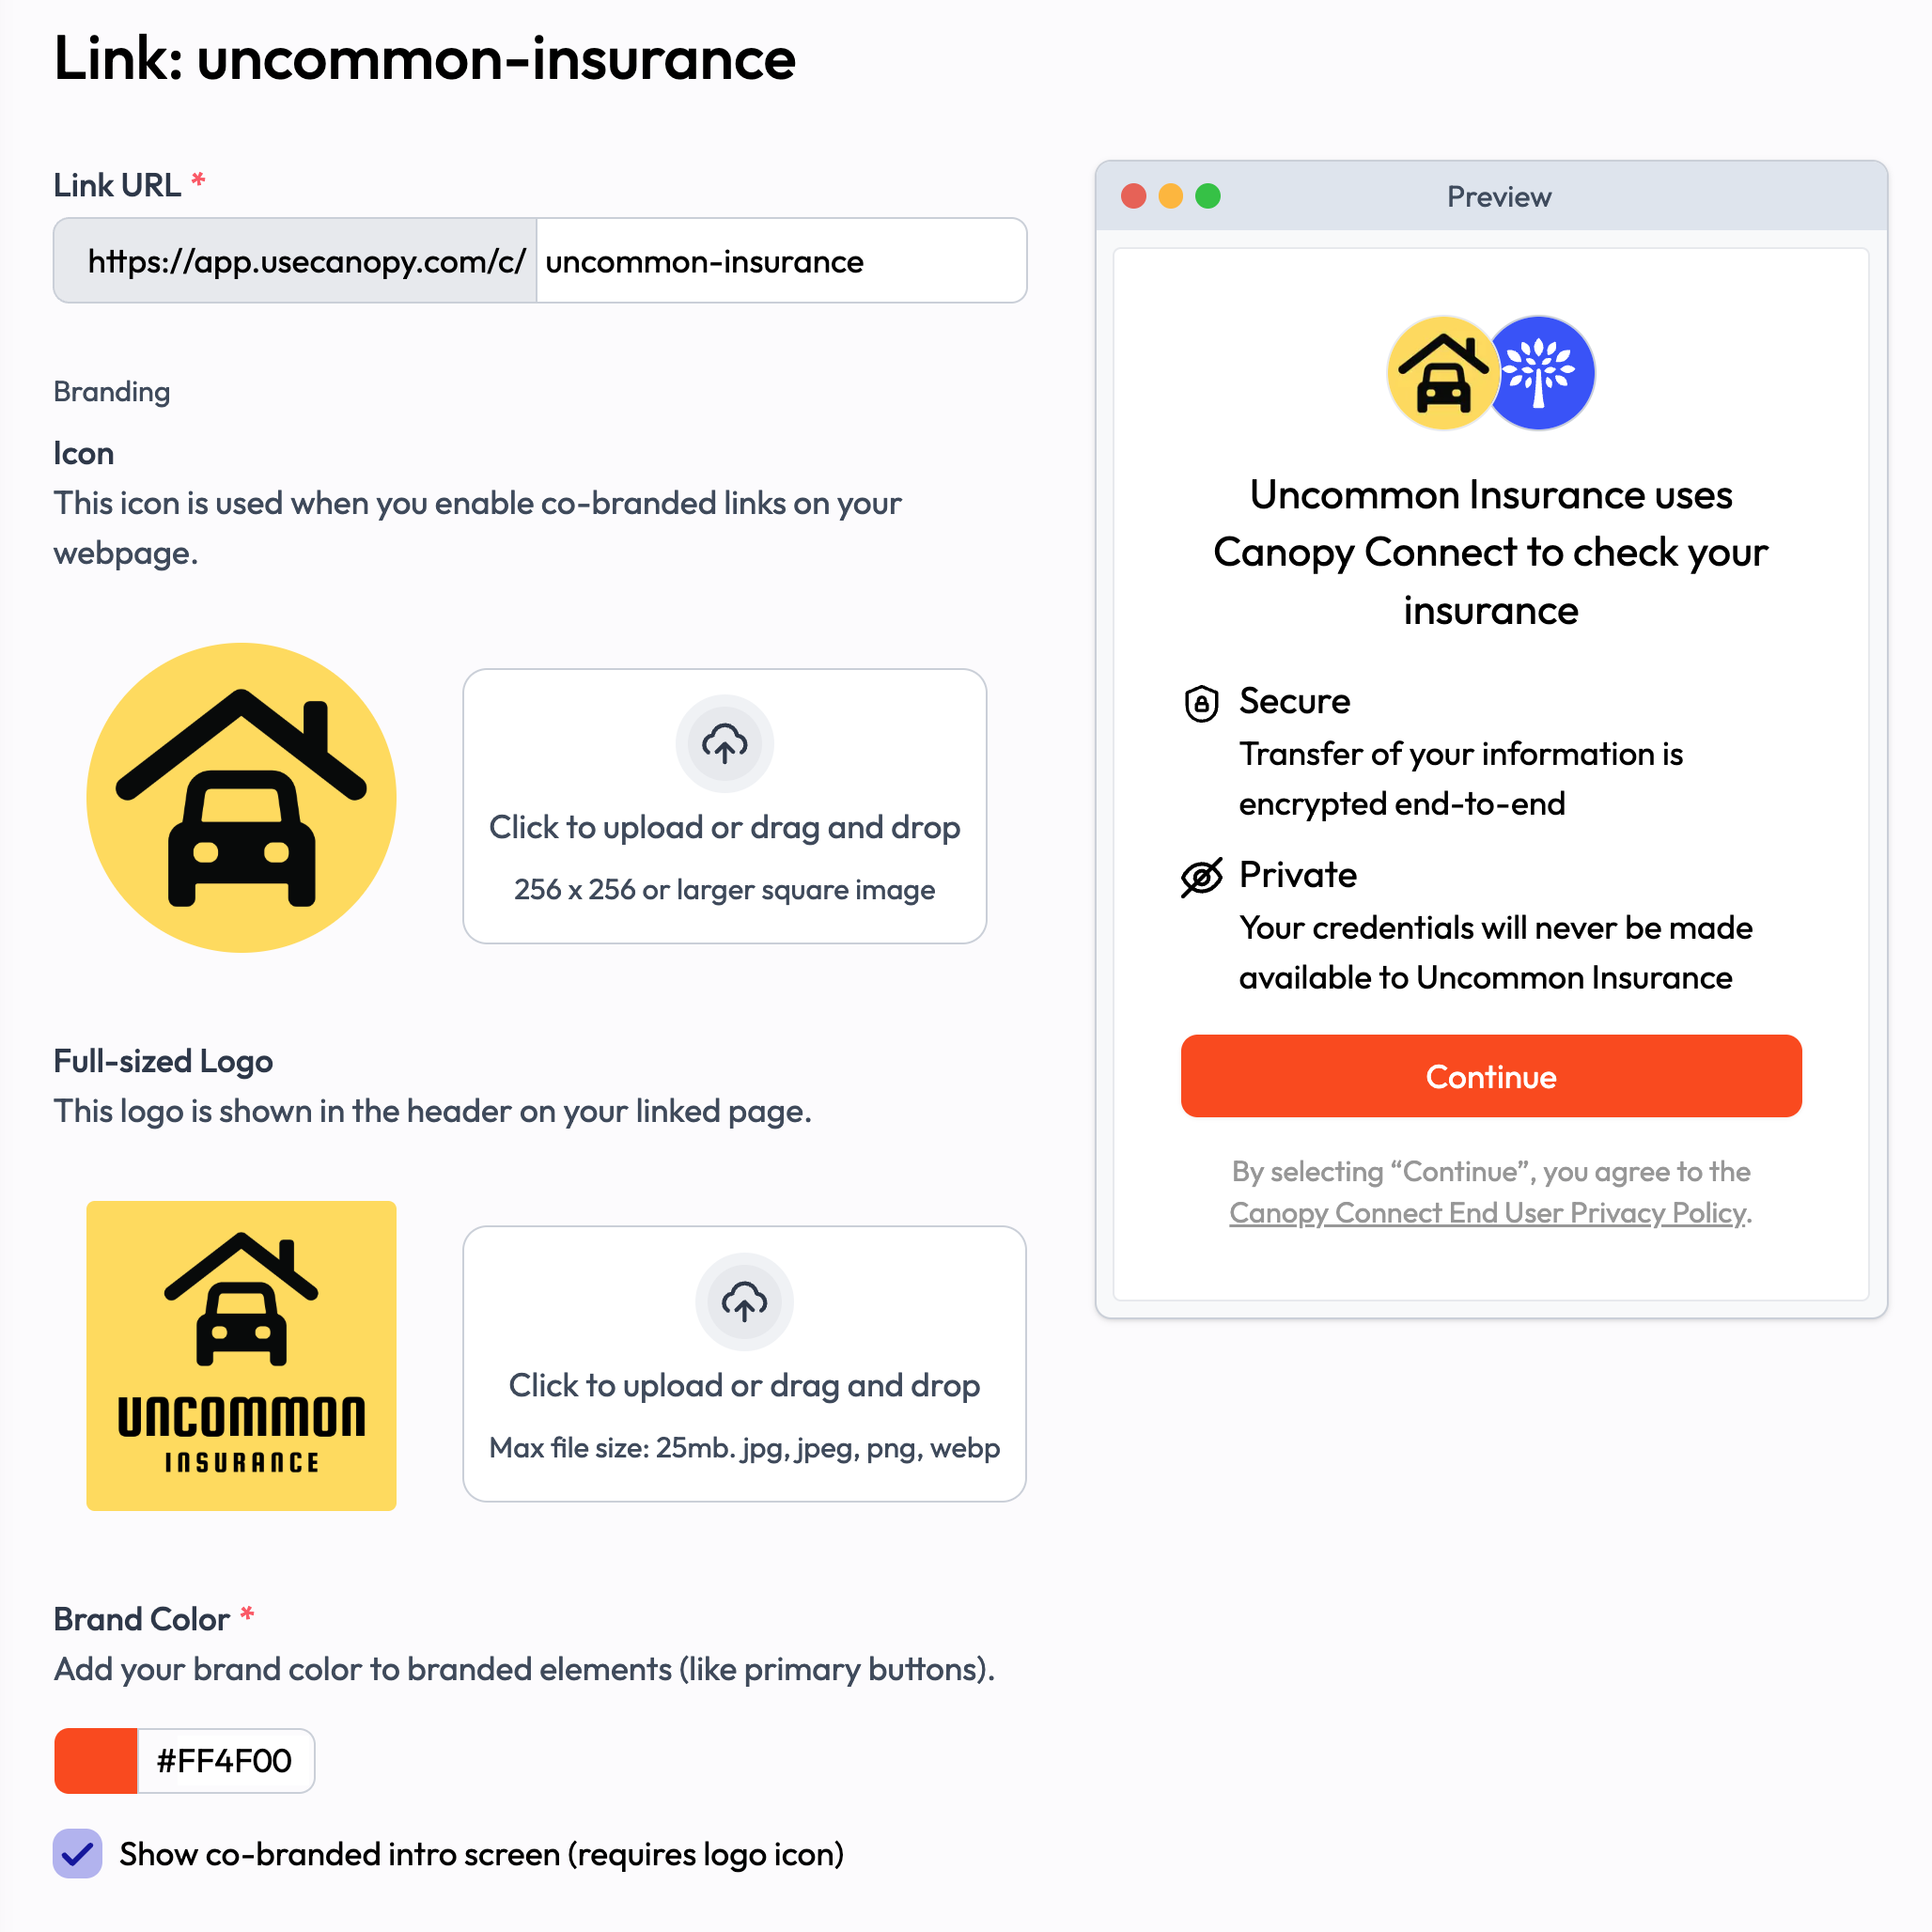
Customize Your Link
Your Canopy Link allows your prospects and clients to submit their insurance information to you securely and quickly. Make sure it looks its best.
- Accessing Your Links: Click on Links from the left sidebar of your dashboard to view your links.
- Customizing Your Link: Click the edit button to bring up an edit field to change your Link URL to whatever you like.
- Customizing Your Branding: In the edit window, you can upload a logo icon, a company logo, and select a brand color.
- Additional Customizations: Customize the text elements of your widget, the message they see when they've completed the process, and an optional redirect URL to guide people back to your website.
Sending Links to Prospects
Share your link with several great options!
- Use the Copy Button Next to Your Link: Use the copy button next to your blue link to easily copy and paste your link. Try sending it in text messages, on social media, or anywhere you can click a link!
- Share it in a Text: Click on the Send button to send your link to prospects without leaving your dashboard.
Note: SMS/Texting requires additional configuration. - Promote it on Facebook: Press the Facebook Share button to automatically populate a Facebook post with your link.
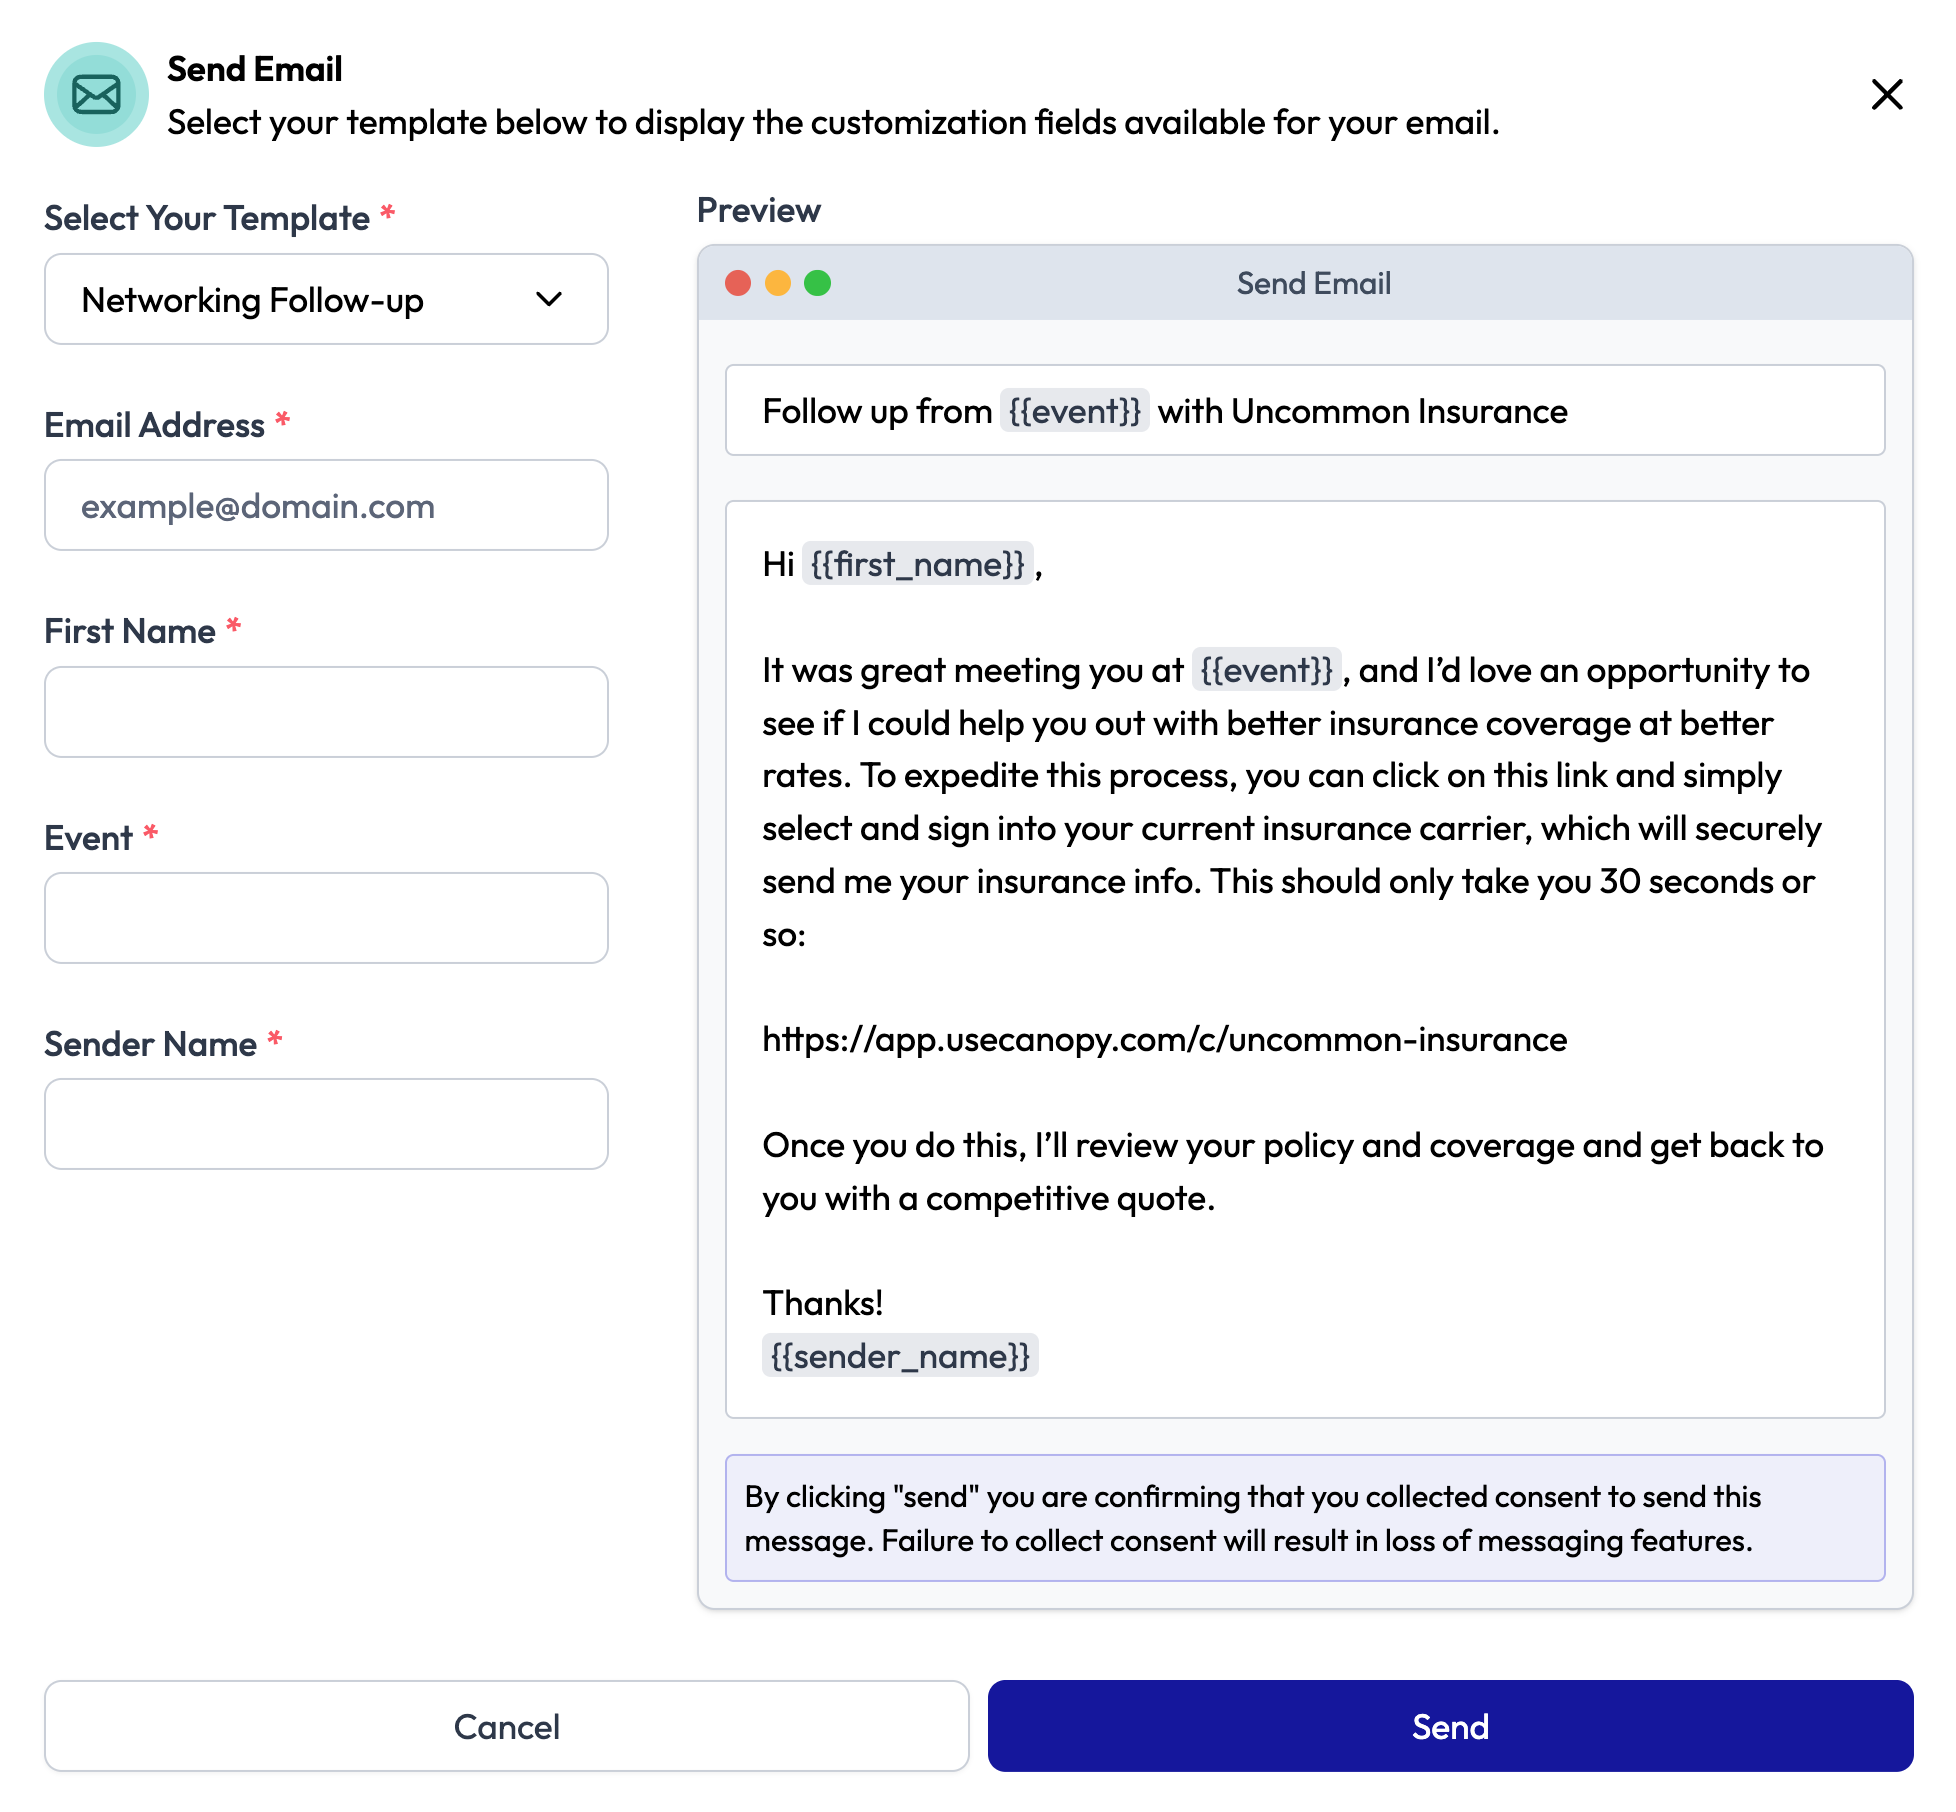
- Send it Via Email: Automatically bring up your email client with the link and custom template already added to a new email.
- Share Your QR Code with Prospects on the Go: Send the QR code to your phone so your prospects can easily scan it while they're there in the office with you.
- Custom Text and Email Templates: Several templates are available for email and text and you can create your own as well. Click Contact Templates in the navigation bar.
Viewing Data on Your Activity Dashboard
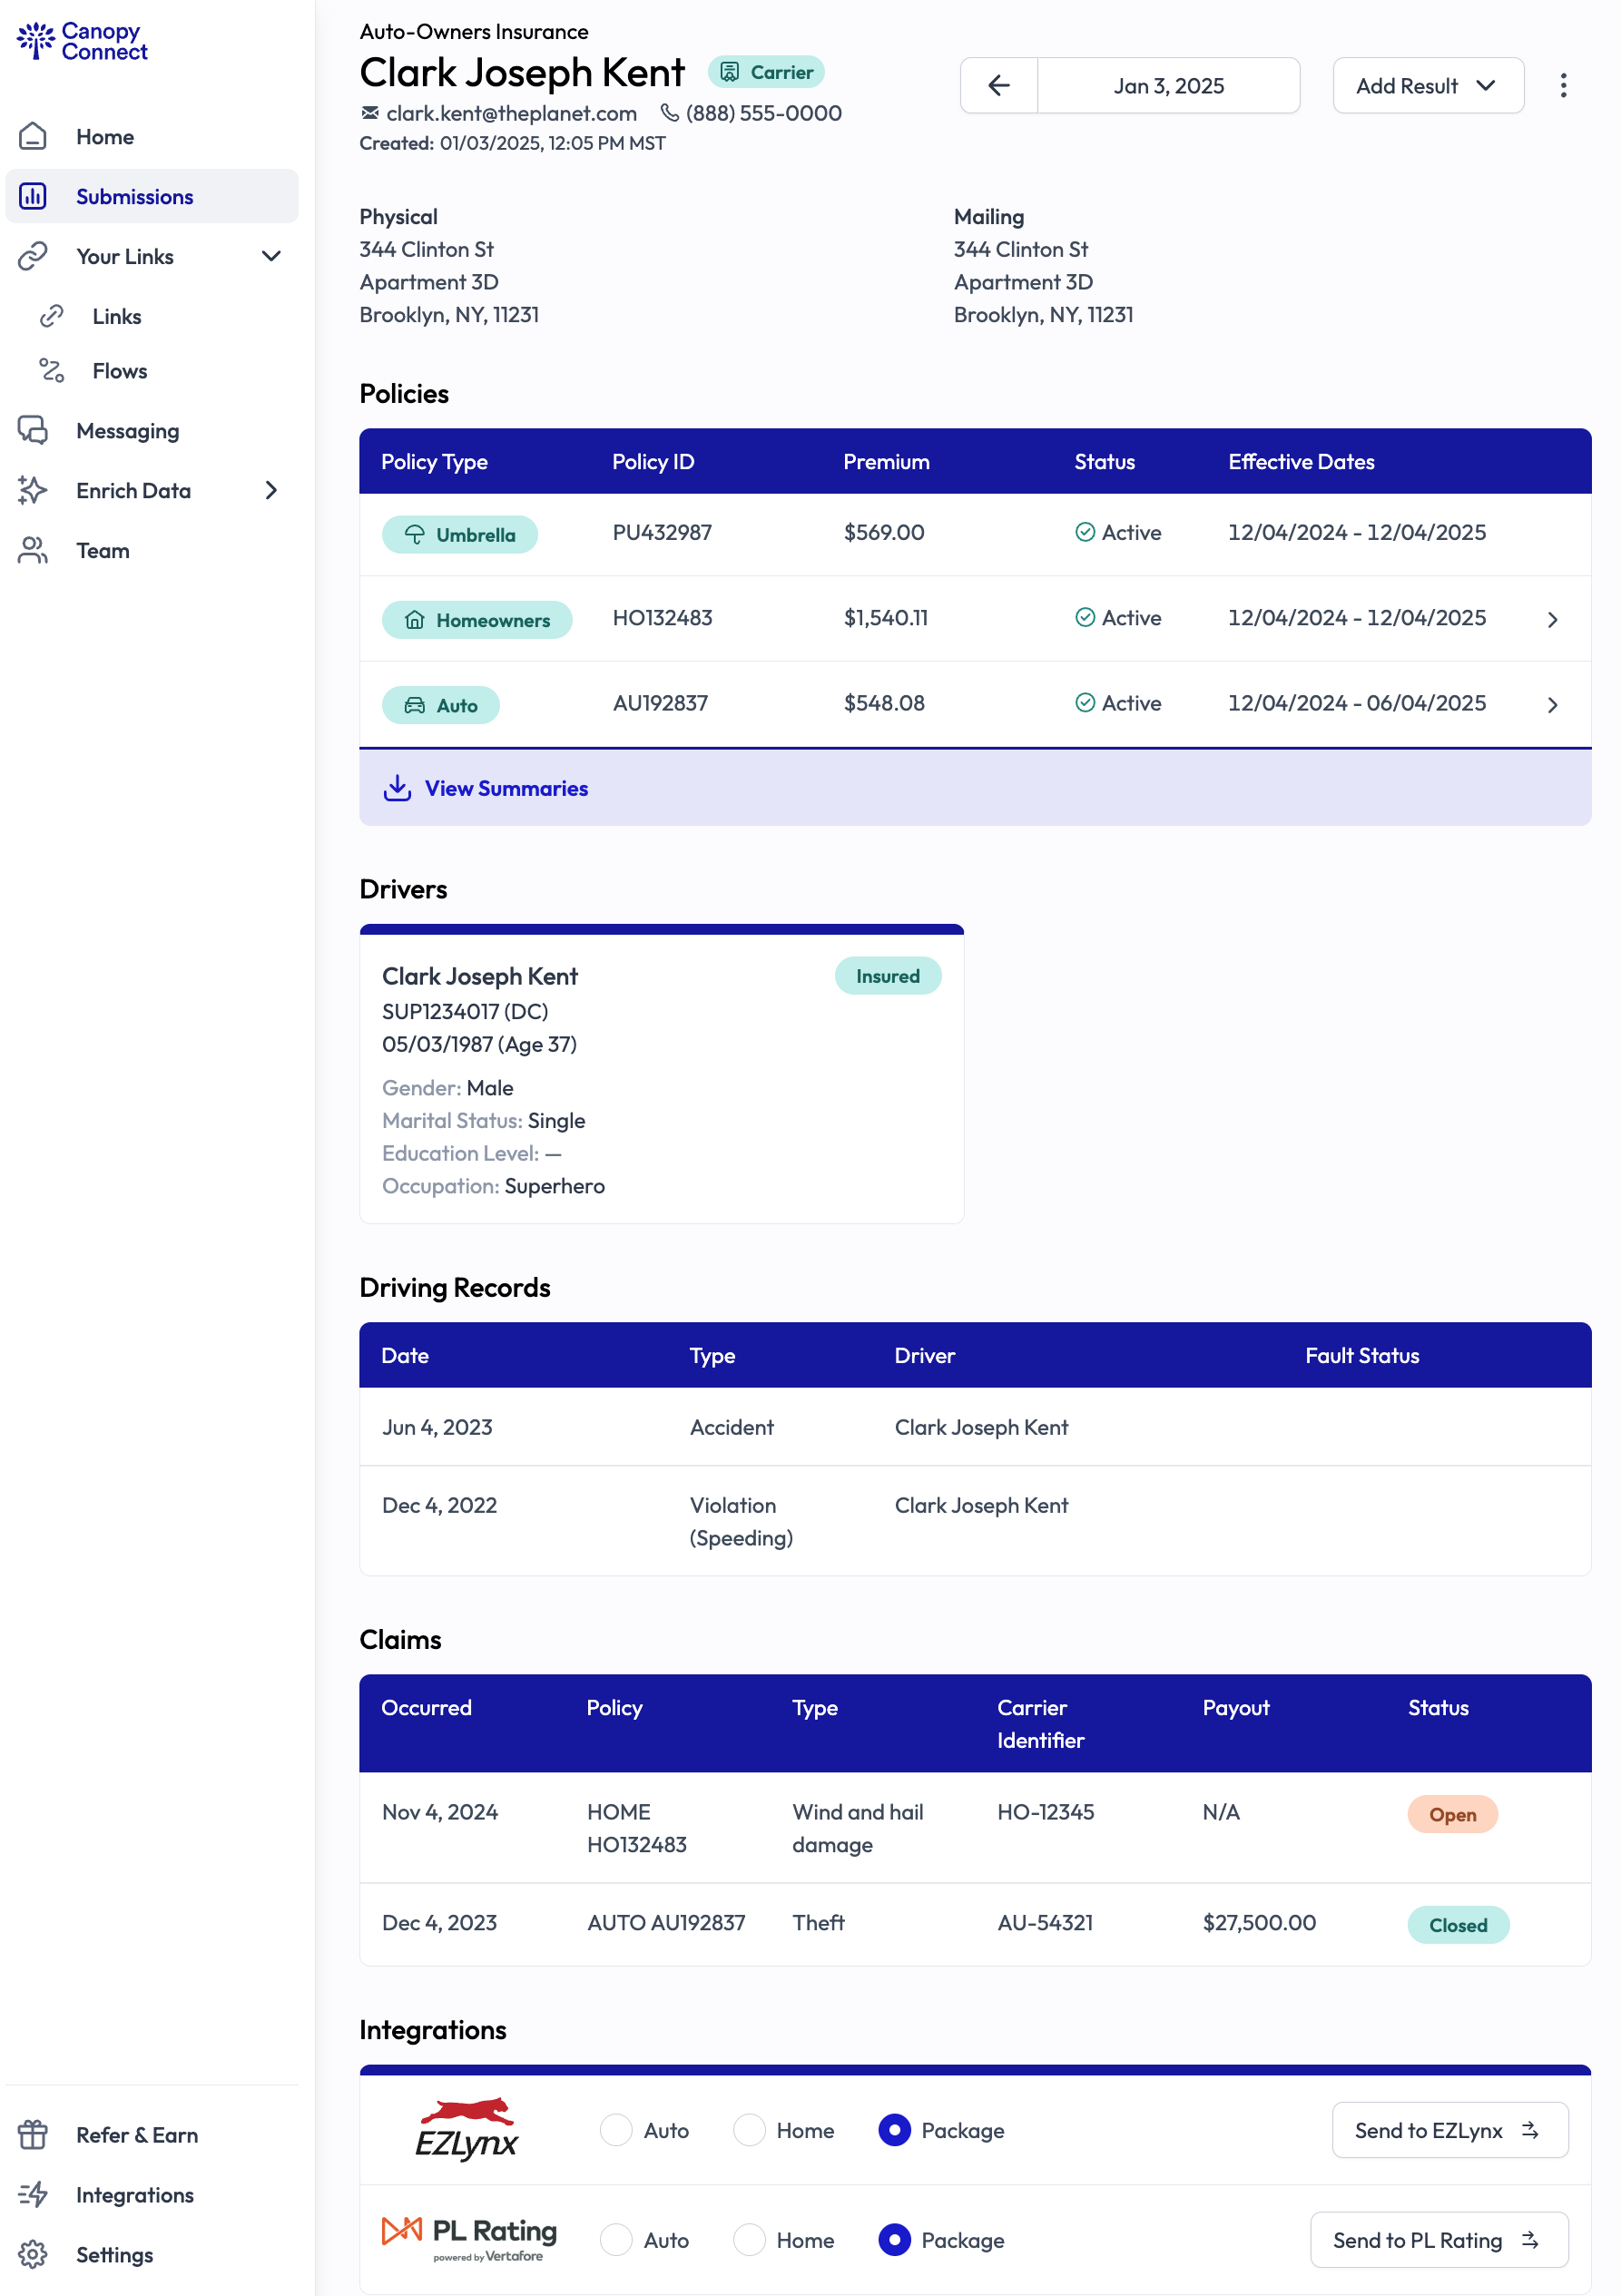
Your dashboard is where you'll see the insurance data that was retrieved by Canopy Connect.
- Accessing Your Links: Data will show up on your dashboard on the Submissions tab as it becomes available. Click on a prospect to expand the section and show detailed information.
- Review Policy Details: Click on each listed policy to see coverage details including limits, deductibles, and premiums.
- See Drivers, Driving Records, and Claims History: Having this information will help you generate a more accurate rate quote. Data availability varies by carrier and policies. If you are on the Agency Plus plan, you'll also see detailed property data.
- Integrations: Canopy Connect integrates with raters, CRMs, AMSs and other technology. Contact our support team to explore integration options.
- Documents: View the most recent documents such as Declarations, Insurance Cards, and Renewals in PDF format. Historical documents from previous terms can be made available with the Agency Plus plan.
Managing Users
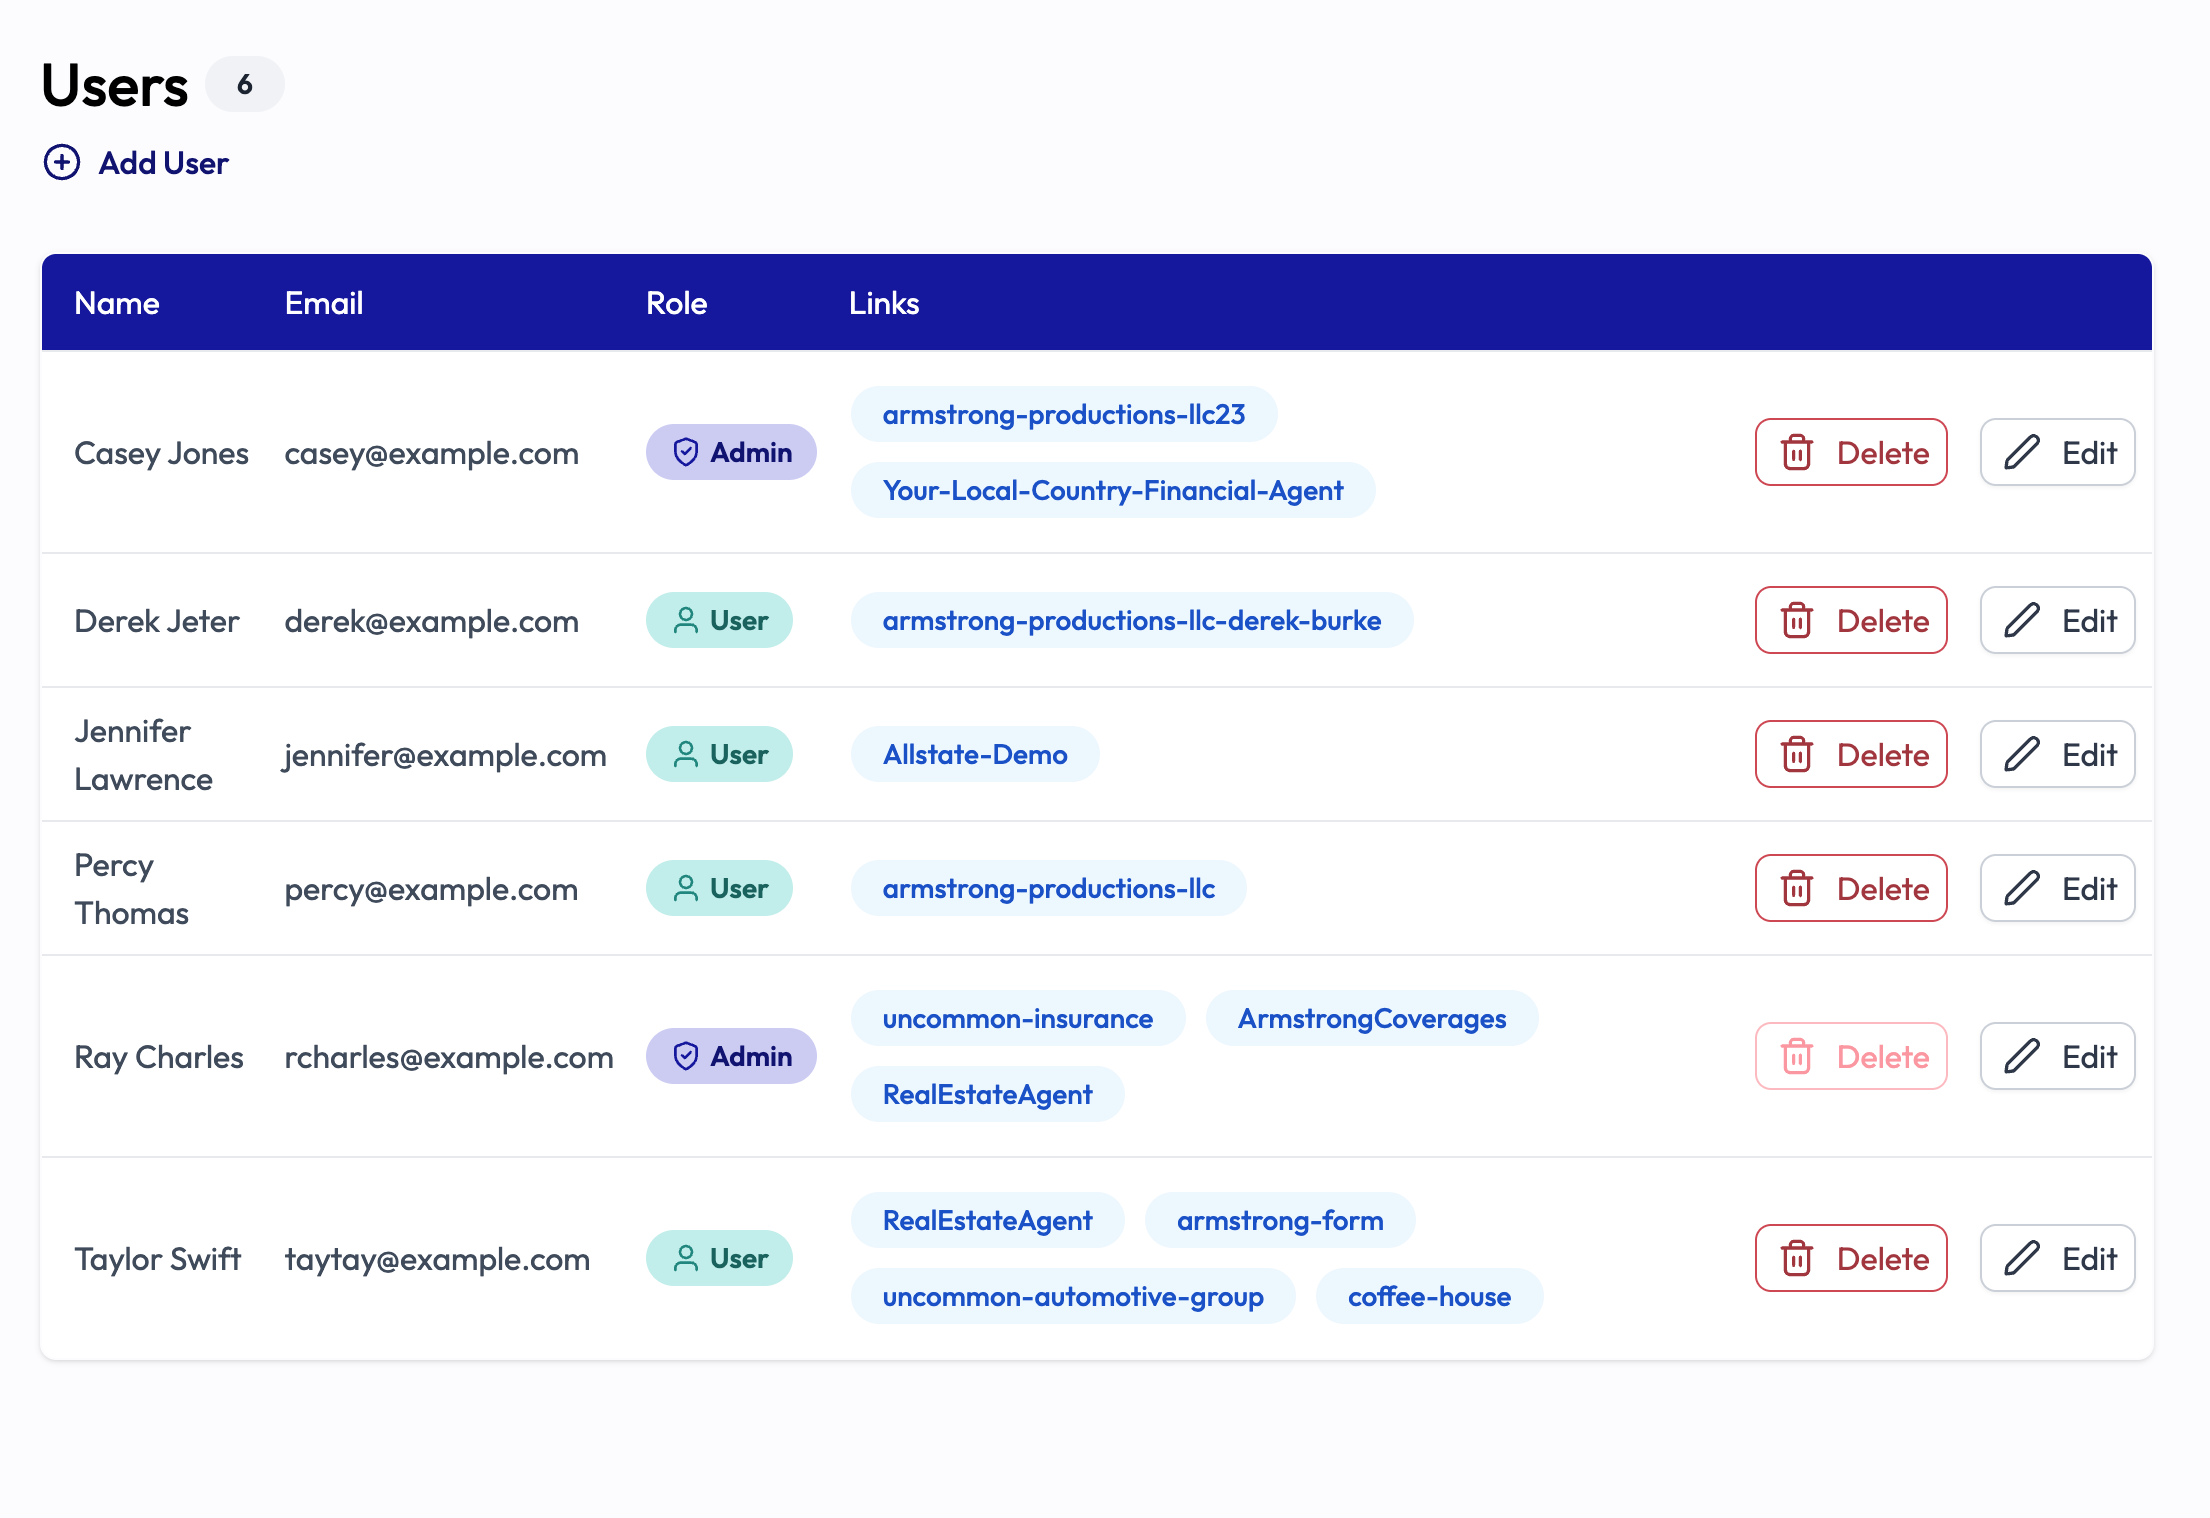
This feature is for administrators to manage the team.
- Manage Users from the Team page: Add a new user by clicking the Add an account button. Edit a users name and permissions with the Edit button.
- Add a User to Your Team: Fill in the name and email address then assign as either an Admin or User role. Admins have full account access while users only have access to information generated from the links they have access to.
- Manage Link Access: Choose which links a user has access to and receives notifications for by clicking on the checkbox next to the link's name - users will only receive notifications for links they are given here.
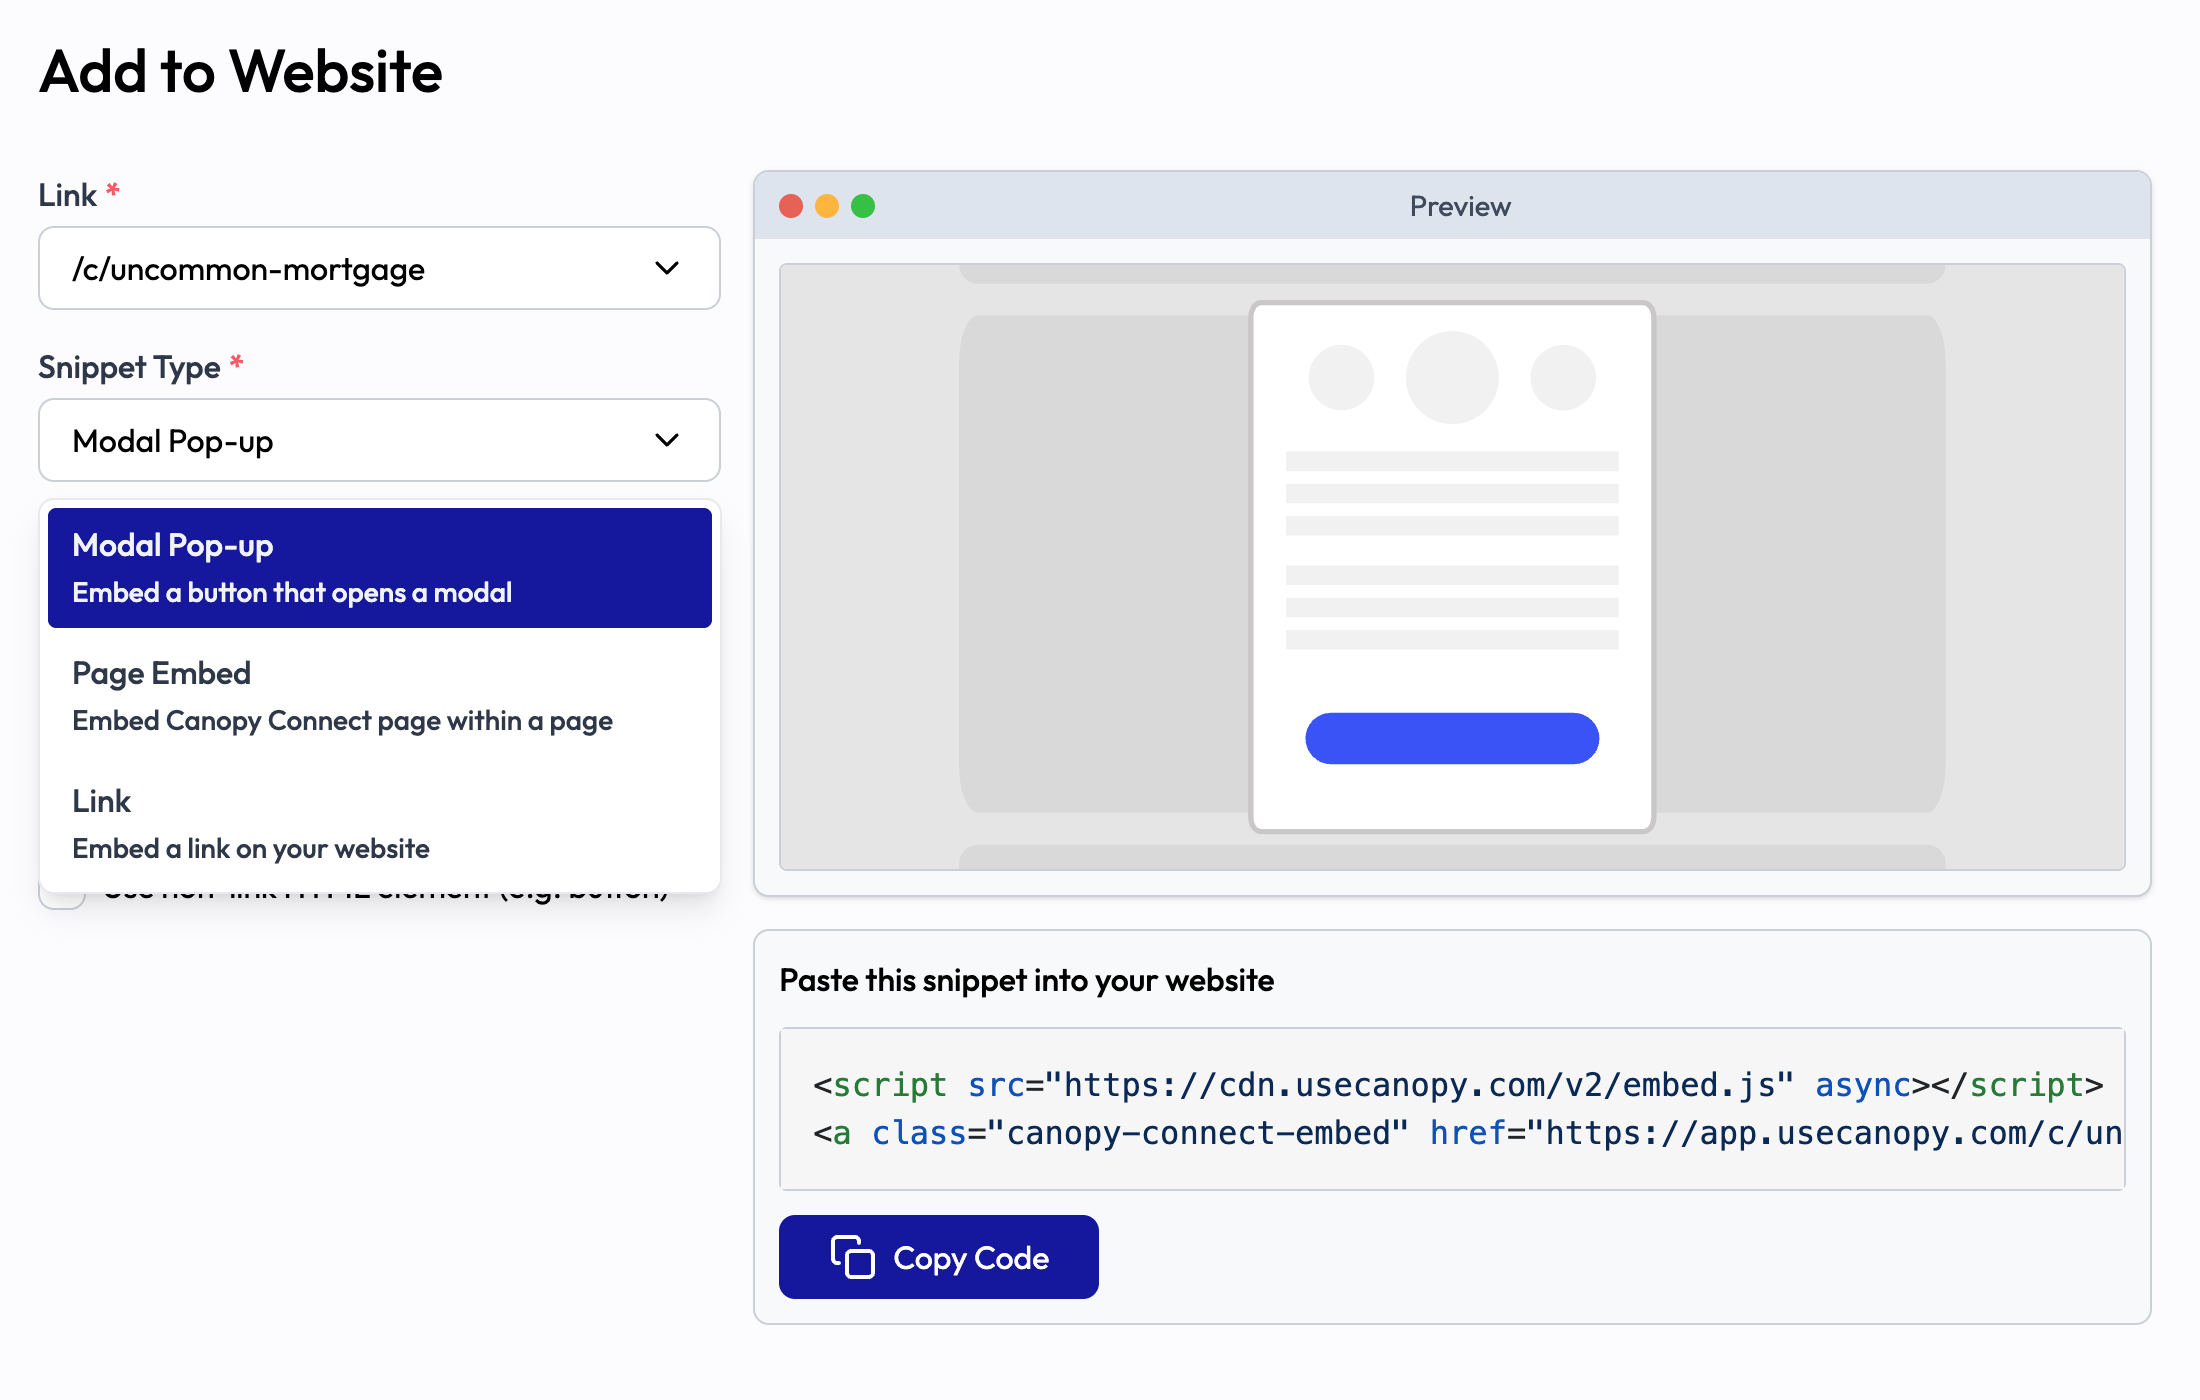
Add a Widget to Your Website
On the Links page, select a link to feature on your website, then generate a snippet to easily add it. Do it yourself, or send it to your website designer.
- Button and Modal: This will generate a button on your website that, when clicked, will open your Canopy link as an overlay on the current page. Click on the 'Import My Insurance' button on this page.
- Embedded Widget: Embed a full Canopy Connect import page on your website.
- Link: Generate a text link you can copy and paste inline.
Support and Resources
We have a lot of options to learn how to use Canopy Connect.
In-App Guide
Let our in-app guide show you around the various features and functionality of Canopy Connect.
Browse our help center to view more detailed instructions and how-tos.
Live Support
Click the chat icon in Canopy Connect to get help from our support team. We're here for you.
Learn practical tips and techniques that Canopy Connect power users are sharing. Find it in the Resources section on our website and in the app.
Share your success stories and tips with your fellow Canopy Connect users in this interactive group.

Sign Up For Free Live Training
Offered Monday through Thursday

